How to Season a New Frying Pan: Non-Stick and Cast Iron
I wish someone had taught me how to season a frying pan before my first cast iron skillet nearly ended up in the bin. I’d bought it with big dreams — crispy fried eggs, seared steaks with deep brown crusts — and what I got instead was a pan that everything welded itself to, then, after one overzealous scrub, a pan with orange rust blooming across the bottom like a warning flag. I was furious at the pan, when really the pan was furious at me. Nobody had told me that seasoning a frying pan is less about the pan and more about a relationship you build with it.
Seasoning isn’t magic, and it isn’t a one-time ritual you perform and forget. It’s a thin, baked-on layer of oil that turns into something almost like plastic — a hard, dry, natural non-stick coating you build up over time. Once I understood the why behind it, everything changed. My second attempt worked, and that skillet has now cooked breakfast for me thousands of times.
Non-stick pans need a different kind of love. They arrive with their coating ready to go, but they also die young if you abuse them — and the biggest killer is the same thing most of us do without thinking: cranking the heat to high and attacking them with metal spatulas. A little first-use conditioning and some gentle habits will double or triple a non-stick pan’s working life.
This guide covers both: proper cast iron seasoning with the oven method, and the care routine that keeps a non-stick pan slick for years. If you own one of each — and most home cooks do — you’ll leave knowing exactly what to do with both.
Quick Stats for How to Season a Frying Pan
- Total time: 1 hour 15 minutes (mostly hands-off oven time for cast iron; 5 minutes for non-stick conditioning)
- Difficulty: Easy — no special skills required
- What you’ll learn: Cast iron oven seasoning, polymerization explained simply, non-stick first-use care, rust and flaking fixes
- Best for: Brand-new pans, pans that lost their seasoning, or second-hand finds
What You’ll Need
- Neutral high-smoke-point oil (flaxseed, grapeseed, or plain vegetable oil): The oil is the seasoning. High-smoke-point oils polymerize cleanly at oven temperature without going gummy. I use plain vegetable oil — it’s cheap and it works.
- Paper towels or a lint-free cloth: You’ll wipe the oil on, then — critically — wipe almost all of it back off. A linty towel leaves fibers baked into your seasoning, so old t-shirts work even better.
- An oven that reaches 450–500°F (230–260°C): Seasoning happens above the oil’s smoke point, so the oven needs to get properly hot.
- Mild dish soap, a stiff brush or chain-mail scrubber: For the initial wash. Yes, a little soap is fine on a new, unseasoned pan — just not as a daily habit on a seasoned one.
- For non-stick care only: a soft sponge, wooden or silicone utensils, and a teaspoon of cooking oil for first-use conditioning.
- Aluminum foil or a baking sheet: To catch drips in the oven.
The Technique, Step by Step
Step 1: Wash and dry the pan completely. Scrub your new cast iron pan with hot water, a little dish soap, and a stiff brush to remove the factory coating or protective wax. Rinse well, then dry it thoroughly — I put mine on a hot burner for two minutes to evaporate every last drop. Water left on bare iron turns to rust fast, so don’t skip the heat-dry.
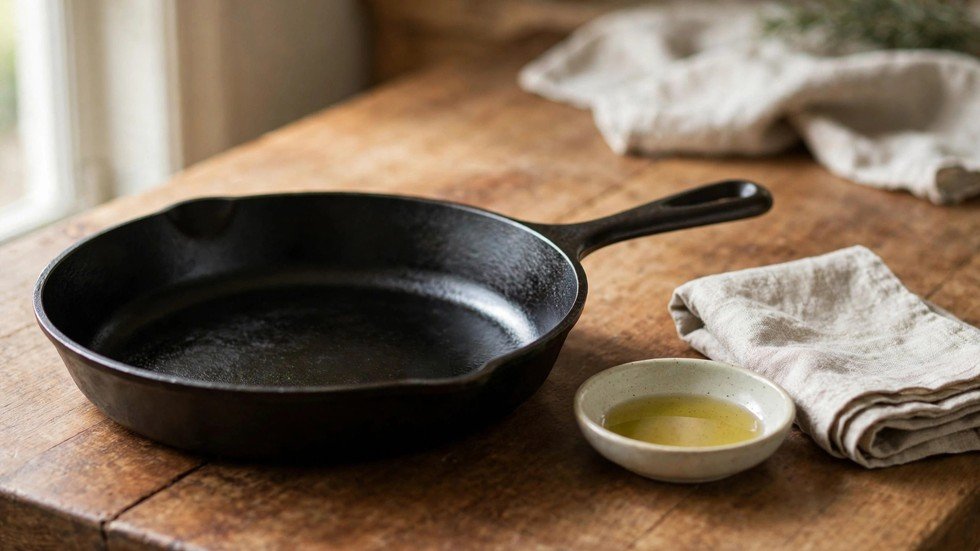
Step 2: Warm the pan slightly, then apply oil. Put the pan in the oven while it preheats to 450°F (230°C) for a few minutes — a warm pan opens the iron’s pores and helps the oil spread evenly. Pull it out with oven mitts, add about a tablespoon of oil, and rub it over every surface: inside, outside, handle, all of it.
Step 3: Wipe the oil off — this is the step everyone gets wrong. Take a clean paper towel or cloth and wipe the pan as if you made a mistake and want all the oil gone. The pan should look dry, with only the faintest sheen. Here’s the why: seasoning is built from an extremely thin layer of oil. A thick layer pools and bakes into sticky, gummy patches instead of hard seasoning. Thin is everything.
Step 4: Bake it upside down for one hour. Place the pan upside down on the middle rack (this lets any excess oil drip away instead of pooling) and put foil on the lower rack to catch drips. Bake at 450–500°F for one full hour. The oil will pass its smoke point and undergo polymerization — the molecules link together into a hard, dry, bonded coating. That’s seasoning: not greasy oil sitting on the surface, but oil transformed by heat into something solid. If your kitchen gets a little smoky, that’s normal — ventilate and carry on.
Step 5: Cool, then repeat. Let the pan cool in the oven, then repeat steps 2–4 two more times. Three thin layers give you a solid base. It won’t be glossy black yet — new seasoning looks patchy and bronze. That deep black patina comes from months of cooking, and it’s earned, not applied.
Step 6: Cook with it — especially fatty foods first. The first few cooks matter. Fry bacon, sear chicken thighs, make grilled cheese with plenty of butter. Fatty cooking builds seasoning faster than anything. Hold off on acidic things like tomato sauce for the first few weeks; acid can strip young seasoning before it’s fully established.
Step 7: Condition your non-stick pan on first use. Wash it with warm soapy water and a soft sponge, dry it, then wipe the interior with a thin film of cooking oil using a paper towel. Heat it on low for one minute, let it cool, wipe out the excess. This fills the coating’s microscopic texture and protects it during its first heat cycles. Repeat this light oiling every few uses.
Step 8: Adopt the non-stick survival rules. Never preheat a non-stick pan empty on high — overheating breaks down the coating and can release fumes. Cook on low to medium heat only, use wooden or silicone utensils (never metal), and wash by hand with a soft sponge. These three habits are the difference between a non-stick pan that lasts two years and one that lasts five or more.
Pro Kitchen Tips for Seasoning a Frying Pan
- Choose your oil by smoke point, not by legend. Flaxseed oil makes a famously hard seasoning but can flake; plain vegetable or canola oil is more forgiving for beginners. Either works — what matters is thin layers and enough heat.
- Seasoning is a process, not an event. The three oven layers are just the foundation. Every time you cook with fat — especially at high heat — you’re adding micro-layers. Six months of regular cooking does more than any oven ritual.
- The stovetop touch-up is your best friend. After cooking and cleaning a cast iron pan, heat it on the burner until bone dry, wipe on a whisper of oil while warm, and let it cool. Thirty seconds of work that keeps seasoning building forever.
- Store cast iron dry with airflow. If you stack pans, put a paper towel or cloth between them to absorb moisture and protect the seasoning from scratching.
- For non-stick, the enemy is thermal shock. Let the pan cool before running cold water over it. Sudden temperature changes can warp the pan and stress the coating. Ten minutes of patience extends its life measurably.
- Skip the dishwasher for both. Dishwasher detergent is harsh and the long hot cycle attacks both seasoning and non-stick coatings. Hand washing takes a minute and your pans will thank you with years of extra service.
Troubleshooting Advice
- Sticky, tacky seasoning patches. Cause: too much oil in a layer. Fix: it’s not ruined — bake the pan upside down at 450°F for another hour and the sticky spots will often harden. If they don’t, scrub the worst patches with coarse salt and a little oil, rinse, and re-season with properly wiped-off thin layers.
- Rust spots. Cause: moisture left on bare iron. Fix: scrub the rust away with a stiff brush or fine steel wool until you see clean metal, wash, heat-dry immediately, and re-season that area with one or two oven layers. Surface rust is cosmetic and totally recoverable.
- Seasoning flaking off. Cause: usually flaxseed oil applied too thickly, or the factory seasoning lifting. Fix: scrub the loose flakes off, smooth the edges with a scouring pad, and build new thin layers over the top. The pan is fine — flaking is a surface problem, not a pan problem.
- Flaking in non-stick. Cause: metal utensils or overheating. Fix: unfortunately, unlike cast iron, a damaged non-stick coating can’t be repaired. If it’s flaking into food, replace the pan — and treat the next one gently from day one.
- Food still sticks on cast iron. Cause: seasoning is young, heat is wrong, or the pan wasn’t preheated. Fix: preheat the pan properly, add fat to a hot pan, and keep cooking fatty foods. Also make sure you’re not trying to cook eggs on a pan seasoned only twice — give it time and it will come around.
How to Season a Frying Pan FAQs
Can I season a pan on the stovetop instead of the oven?
You can do touch-ups on the stovetop, but full seasoning belongs in the oven. The oven heats the entire pan — inside, outside, handle — evenly and above the oil’s smoke point, which is what drives polymerization. Stovetop heat is concentrated and uneven, so it works for maintenance layers but not for building a base.
Is dish soap really okay on cast iron?
On a new, unseasoned pan: yes, and you should use it to strip the factory coating. On a well-seasoned pan, a small amount of mild soap for a quick wash won’t destroy your seasoning — modern dish soap isn’t the lye-based soap of your grandmother’s day. What damages seasoning is long soaks and harsh scrubbing, not a brief soapy wash.
How do I know when a non-stick pan needs replacing?
When eggs stick even after gentle cleaning and re-conditioning, or you see visible scratches, chips, or flaking in the coating. A damaged non-stick coating can’t be repaired the way cast iron seasoning can. Replace it and start fresh with the conditioning routine — your next pan will last much longer.
A well-seasoned pan changes how you cook — that’s why learning how to season a frying pan is worth an afternoon. My cast iron skillet, once the most frustrating object in my kitchen, is now the one I’d grab in a fire — and my non-stick pan, treated gently, is going strong years past its expected lifespan. Spend an afternoon seasoning the iron and five minutes conditioning the non-stick, and both will pay you back every single day.
You Might Also Like
If you’re building your kitchen from scratch, check out our 10 Kitchen Tools Beginners Actually Need (and 5 to Skip) next — the right tools make seasoning and cooking so much easier.