
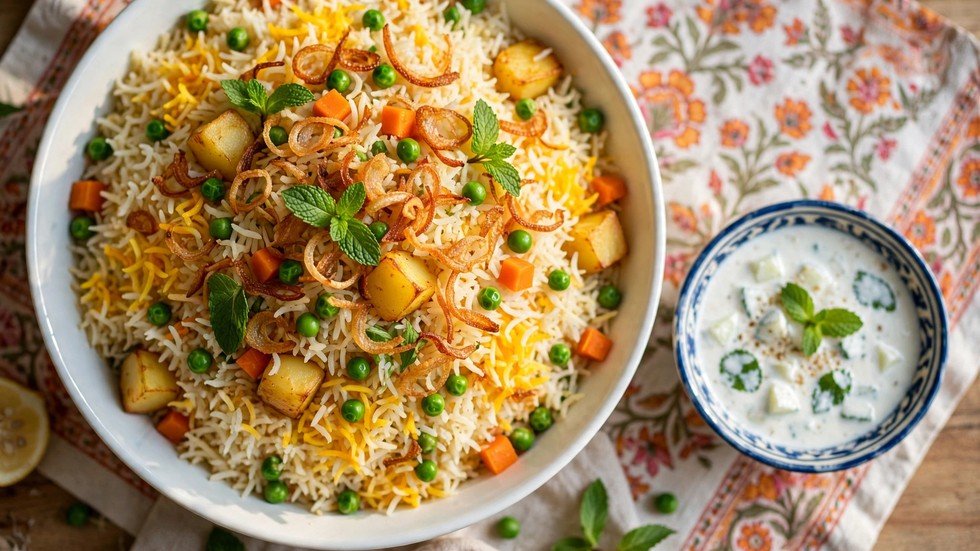
Budget Vegetable Biryani (One Pot)
Biryani is celebration food. In my house, it meant Eid mornings, the smell of saffron hitting hot rice, and my mother guarding the pot like it contained treasure. It also meant chicken or mutton — the expensive centerpiece. For years I assumed biryani without meat was a compromise, something you settled for. This budget vegetable biryani changed my mind completely.
Then a vegetarian friend challenged me to make her a biryani worth serving at a dinner party, on a tight budget, in one pot. No separate meat curry, no elaborate layering across three vessels. I was skeptical. One pot of rice and vegetables sounded like pulao wearing a costume.
I was wrong. Done right — with a proper masala base, real layering, crispy onions, and a genuine dum — vegetable biryani earns the name. The vegetables caramelize and sweeten, the rice steams in spiced vapor, and the whole pot smells like a wedding hall. It costs a fraction of meat biryani and feeds a crowd. This is the recipe I make now whenever I want that festive feeling on an ordinary Tuesday.
Quick Stats
- Prep Time: 20 minutes (plus 30 minutes rice soaking)
- Cook Time: 30 minutes
- Total Time: 50 minutes active
- Servings: 4–5
- Difficulty: Medium — but very forgiving
- Cost Per Serving: A fraction of chicken biryani
- Best Served With: Raita, kachumber salad, and lemon wedges
Equipment Needed
Biryani is about steam control. Your pot choice matters more than anything else here.
- A heavy-bottomed pot with a tight-fitting lid (at least 4 liters) — thin pots scorch the bottom layer during dum. A Dutch oven is perfect. If your lid is loose, you’ll need the dough-seal trick or a clean kitchen towel under the lid.
- A fine-mesh strainer or colander — for the soaked rice.
- A small bowl — for blooming saffron in warm milk.
- A wide spoon or spatula — for gentle layering. No vigorous stirring after this point.
Ingredients & Substitutions
For the rice:
- 2 cups basmati rice, soaked 30 minutes and drained — don’t skip the soak. Soaked grains cook evenly and grow long instead of breaking. Cheaper long-grain rice works, but basmati’s aroma is half the biryani experience.
For the vegetable masala:
- 2 medium potatoes, cut into 1-inch cubes
- 1 cup cauliflower florets — small ones, so they cook through.
- 1 large carrot, cut into thick coins
- ¾ cup frozen peas
- 2 large onions, thinly sliced — half for the masala, half fried crisp for layering.
- 2 medium tomatoes, chopped
- ½ cup plain yogurt, whisked
- 1 tablespoon ginger-garlic paste
- 4 tablespoons oil or ghee
Spices:
- Whole: 1 bay leaf, 4 green cardamoms, 4 cloves, 1-inch cinnamon, 1 teaspoon cumin seeds
- 1 tablespoon coriander powder, 1 teaspoon cumin powder, 1 teaspoon red chili powder, ½ teaspoon turmeric
- 1½ teaspoons salt, plus more to taste
- 1 teaspoon biryani masala or garam masala
For layering:
- A generous pinch of saffron soaked in 3 tablespoons warm milk — the luxury touch. No saffron? Use ¼ teaspoon turmeric in the milk for color, plus a drop of kewra or rose water for aroma. It won’t be identical, but it’ll be lovely.
- ½ cup each fresh mint and coriander leaves, chopped
- 2 green chilies, slit
Step-by-Step Method
Step 1: Soak the rice — and don’t rush it. Rinse the basmati in cold water until it runs clear, then soak in plenty of water for 30 minutes. Soaking lets each grain absorb water evenly, so they cook through at the same rate and stretch long instead of snapping. Drain well before using. Wet, unsoaked rice in biryani cooks unevenly — mushy outside, chalky inside.
Step 2: Crisp the potatoes and cauliflower. Heat 2 tablespoons of oil in your heavy pot over medium-high heat. Add the potato cubes and cauliflower florets with a pinch of salt and cook 5 to 6 minutes, turning, until they pick up golden edges. You’re not cooking them through — just giving them color and a head start, so they don’t turn to mush during the dum. Remove to a plate. This pre-sear is the difference between distinct, toothsome vegetables and a sad mixed-veg mush.
Step 3: Fry half the onions until deeply crisp. In the same pot, add the remaining oil and half the sliced onions. Fry over medium heat, stirring, for 8 to 10 minutes until deep golden brown and crisp. Remove with a slotted spoon and drain on a plate. These crispy onions (birista) go into the layers and on top — they’re sweet, crunchy, and unmistakably biryani. Yes, you can use store-bought fried onions to save time. No shame in it; I do it on busy days.
Step 4: Build the masala base. In the same oil, add the remaining sliced onions and cook 5 minutes until golden. Add whole spices and ginger-garlic paste; cook one minute. Add tomatoes, all the ground spices, and salt. Cook 5 to 6 minutes until the tomatoes melt and oil appears at the edges. Whisk in the yogurt off the heat (to prevent splitting), then return to the flame. Add the seared potatoes, cauliflower, carrots, and peas. Toss for 2 minutes so every vegetable gets coated. This masala is the flavor engine of the whole dish — it should taste bold and slightly over-salted at this stage, because the plain rice will dilute it.
Step 5: Layer — rice, masala, garnishes. Spread the vegetable masala evenly over the pot bottom. Scatter half the drained rice over it in an even layer — don’t dump it in a mound. Sprinkle over half the crispy onions, half the mint and coriander, the slit green chilies, and drizzle half the saffron milk. Repeat: remaining rice, remaining onions, herbs, and saffron milk. The layering isn’t decoration; it means every serving gets rice that’s touched both masala and steam, with pockets of concentrated flavor.
Step 6: Dum — the sealed steam. Drizzle a tablespoon of ghee or oil over the top. Cover the pot with a tight lid. If your lid is loose, lay a clean kitchen towel over the pot before the lid (it traps steam; keep the towel ends away from the flame) or seal the rim with a simple flour-water dough. Cook on high heat for 3 minutes — you want to hear a faint sizzle — then drop to the lowest possible heat for 17 minutes. Don’t lift the lid. Not once. The trapped steam is cooking the rice gently and carrying the spice aromas upward through every layer.
Step 7: Rest, then reveal. Turn off the heat and let the pot sit, still covered, for 10 minutes. This rest is crucial: the grains firm up and stop steaming, so they stay separate instead of clumping. Now lift the lid and inhale — that’s your reward. Fluff very gently with a fork, scooping from the bottom to bring up the masala-coated vegetables without breaking the rice.
Pro Kitchen Tips
- Season the masala boldly. Plain rice dilutes everything. The vegetable layer should taste slightly too salty and slightly too spicy before the rice goes on — it balances perfectly after dum.
- Don’t stir after layering. Ever. Stirring breaks the rice and turns layers into mush. If you’re nervous about the bottom burning, trust your heavy pot and low flame instead.
- The towel-under-lid trick works. A clean, damp kitchen towel between pot and lid catches condensation that would otherwise drip back and make the top rice soggy. Just keep the towel away from the burner.
- Add paneer for protein. A cup of cubed, lightly fried paneer layered in with the vegetables makes this a complete meal. It soaks up the masala beautifully.
- Saffron on a budget: a tiny pinch goes a long way when bloomed in warm milk. And honestly? Half the “saffron” color in restaurant biryani is food coloring. Turmeric milk plus kewra water is a respectable stand-in.
Troubleshooting Advice
- The rice is mushy. Too much moisture — either the vegetables released a lot of water or the dum ran long. Next time, make sure the masala is thick (not watery) before layering, and don’t exceed 20 minutes on low. There’s no fixing mushy rice, but it still tastes good — call it “biryani bowl” and move on.
- The bottom layer burned. The flame was too high during dum or the pot was too thin. A heavy pot and the lowest flame are the prevention. If only the very bottom caught, don’t scrape it — serve from the top and leave the burnt layer behind. (The crispy bottom, if just golden, is actually a delicacy — Persian cooks fight over it.)
- Rice is undercooked and crunchy. The seal wasn’t tight and steam escaped, or the rice needed more time. Sprinkle 3–4 tablespoons of hot water over the top, reseal tightly, and give it 10 more minutes on low.
- Bland despite the spice list. The layers weren’t seasoned individually. Salt the vegetables when searing, salt the masala boldly, and make sure the crispy onions actually made it in — they contribute more flavor than people realize.
- Vegetables turned to mush. They were cut too small or overcooked in Step 2. Keep potato and cauliflower pieces chunky — 1-inch minimum — and remember the sear is just for color, not for cooking through.
FAQs
Can I make this without saffron?
Yes. Warm milk with ¼ teaspoon turmeric gives the golden color, and a few drops of kewra water or rose water add the floral aroma saffron would bring. It won’t be identical, but it’ll still smell and taste festive. Save the saffron for when you want to impress someone.
Can I prepare vegetable biryani ahead of time?
You can prep everything ahead — chop vegetables, make the masala base, even fry the onions a day before. But do the layering and dum fresh; biryani doesn’t love being reheated in layers. Assembled and dum-cooked, it keeps 3 days in the fridge. Reheat covered on low with a sprinkle of water.
How is this different from vegetable pulao?
Technique and intensity. Pulao cooks everything together in one go — simpler, milder. Biryani layers a bold, concentrated masala with rice and finishes on sealed steam, so you get distinct strata of flavor, crispy onions, and that saffron perfume. More work, more payoff.
This biryani taught me that “budget” and “celebration” aren’t opposites. A pot of spiced rice and vegetables, layered with care and finished on dum, can make an ordinary weeknight feel like a feast. My vegetarian friend was right to challenge me — and she’s requested it at every dinner party since.
You might also like: 15-Minute Chicken Fried Rice That Beats Takeout