Batch-Cook Curry Base Gravy: Meal Prep Masala for the Week
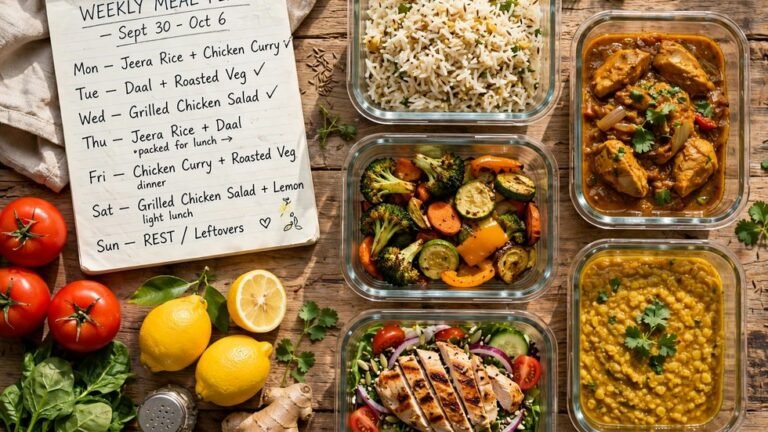
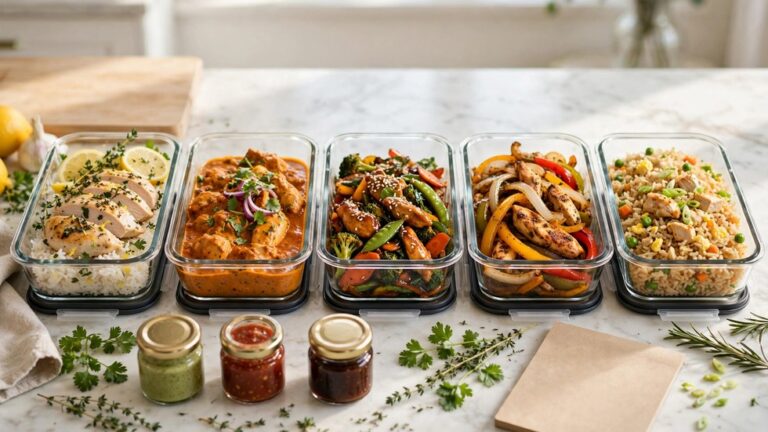
Every Sunday evening, I spend about forty-five minutes on this batch cook curry base gravy — something that changes my entire week. I cook a huge pot: one batch, roughly two liters of deep, rich, restaurant-style masala. That’s it. And then for the next five days, “making curry” means heating up some of that gravy, tossing in chicken or chickpeas or paneer, and sitting down to eat fifteen minutes later. My weeknight cooking went from a daily thirty-minute production to something closer to assembling dinner.
I picked up the idea from restaurant kitchens, where cooks don’t start every curry from raw onions — they start from a mother sauce, a base gravy made in bulk every morning. The base does all the slow, boring work (browning onions, melting tomatoes, blooming spices) so the final dish only needs the last ten minutes of fresh cooking. Home cooks can steal this exact trick. The base is where ninety percent of a curry’s flavor lives anyway; the protein and vegetables you add at the end are just the last ten percent.
This is my full method: the recipe, why each step matters, how to store it, and how to turn it into a different curry every night without getting bored.
Quick Stats
- Prep Time: 15 minutes
- Cook Time: 40 minutes
- Total Time: 55 minutes (one session, once a week)
- Yield: About 2 liters (8–10 curry servings)
- Difficulty: Easy
- Best Used For: Chicken curry, chickpea curry, paneer masala, aloo curry, dal makhani-style lentils
Equipment Needed
- A large, heavy-bottomed pot or Dutch oven (5 liters or more) — you’re cooking two liters of gravy plus raw vegetables that release water, so you need headroom. Heavy bottoms prevent the onion sugars from catching and burning during the long browning stage, which is the heart of this recipe.
- A wooden spoon with a flat edge — for scraping the bottom of the pot. The browned bits that stick during onion browning are concentrated flavor, and you want them back in the gravy, not welded to the pot.
- An immersion blender or regular blender — the base gets blended smooth at the end. An immersion blender means no transferring hot liquid; if you use a countertop blender, blend in batches and vent the lid so steam doesn’t blow the top off.
- Airtight containers or freezer bags — portion the gravy before storing. Freezing in flat zip-lock bags saves space and thaws in minutes under warm water.
- A measuring jug — you’ll portion roughly 250 ml (about a cup) per curry serving, and measuring keeps your weeknight curries consistent.
What You’ll Need
- 1 kg onions (about 6–7 medium), finely chopped — this is the backbone of the whole gravy. Onions are mostly water and sugar; the long, slow browning converts those sugars into deep, sweet, caramelized flavor that no shortcut can fake. Chop them fine so they break down evenly.
- 800g ripe tomatoes, chopped (or 2 tins of chopped tomatoes) — fresh tomatoes give a brighter flavor; tinned give consistency in winter. Either works. The tomatoes provide acidity and body, and they balance the sweetness of the browned onions.
- 6 tablespoons neutral oil or ghee — you need more oil than a normal curry because you’re essentially frying a kilogram of onions. The oil also carries the fat-soluble flavors of the spices and gives the finished gravy its glossy restaurant look.
- 4 tablespoons ginger-garlic paste — equal parts fresh ginger and garlic pounded or blended smooth. This is the aromatic engine of the gravy. Make it fresh if you can; the jarred kind works but tastes slightly muted.
- 3–4 green chilies, slit — they go in whole so their heat infuses gently and you can fish them out. Slit them so they don’t burst and splatter.
- Whole spices: 2 bay leaves, 1 tablespoon cumin seeds, 6–8 green cardamom pods (lightly crushed), 1 black cardamom pod, 6 cloves, 2-inch cinnamon stick — these bloom in hot oil at the start and perfume the entire batch. Whole spices release flavor slowly and evenly, which is exactly what a long-cooked base needs.
- Ground spices: 2 tablespoons coriander powder, 1 tablespoon cumin powder, 2 teaspoons turmeric, 1–2 tablespoons Kashmiri red chili powder (for color), 1 teaspoon garam masala — coriander powder is the thickener and body-builder of the gravy; Kashmiri chili gives that gorgeous red color without brutal heat. Garam masala goes in at the end because its volatile aromatics fade with long cooking.
- 2 tablespoons salt (adjust to taste) — salt in stages: some with the onions to draw out moisture, the rest with the tomatoes. You’ll adjust again when you build each curry.
- 1 tablespoon sugar or jaggery (optional) — a small amount rounds off the tomato acidity and deepens the caramel notes. Taste first; very ripe tomatoes may not need it.
Batch Cook Curry Base Gravy: Step-by-Step Method
Step 1: Brown the onions deeply — this is the whole recipe, honestly.
Heat the oil in your big pot over medium-high heat. Add the whole spices and let them sizzle for 30 seconds until fragrant — the cumin seeds should darken a shade and the cardamom should smell sweet and intense. Then add all the chopped onions and a teaspoon of salt. Now cook them, stirring every few minutes, for 20–25 minutes until they turn a deep golden brown. Not pale gold — deep, amber, almost the color of jaggery at the edges. This is the step people rush, and it’s the step that separates a rich, complex gravy from a flat, oniony one. The browning (the Maillard reaction plus caramelization) creates hundreds of flavor compounds that raw or lightly cooked onions simply don’t have. Put on a podcast. Stir occasionally. Don’t walk away for too long, but don’t fuss over it either — low and slow wins here.
Step 2: Add the ginger-garlic paste and green chilies, and cook out the rawness.
Stir in the ginger-garlic paste and the slit green chilies. Cook for 3–4 minutes, stirring, until the paste loses its sharp raw smell and turns fragrant and slightly golden. Raw ginger-garlic paste has a harsh, almost soapy edge; cooking it in the hot oil tames it into warmth. If the mixture starts sticking, splash in a tablespoon of water and scrape the bottom — those stuck bits are flavor, not failure.
Step 3: Bloom the ground spices in the hot oil.
Push the onion mixture aside, add a spoon of oil if the pot looks dry, and add the coriander powder, cumin powder, turmeric, and Kashmiri chili powder directly to the hot fat. Stir for 45–60 seconds. Spices bloom in fat — their flavor compounds are fat-soluble, so heating them in oil unlocks far more aroma than adding them to water ever could. You’ll know it’s working when the oil turns a vivid orange-red and the smell hits you from across the kitchen. Don’t let them burn; a minute is plenty, and burnt spices turn bitter fast.
Step 4: Add the tomatoes and salt, then simmer until the oil separates.
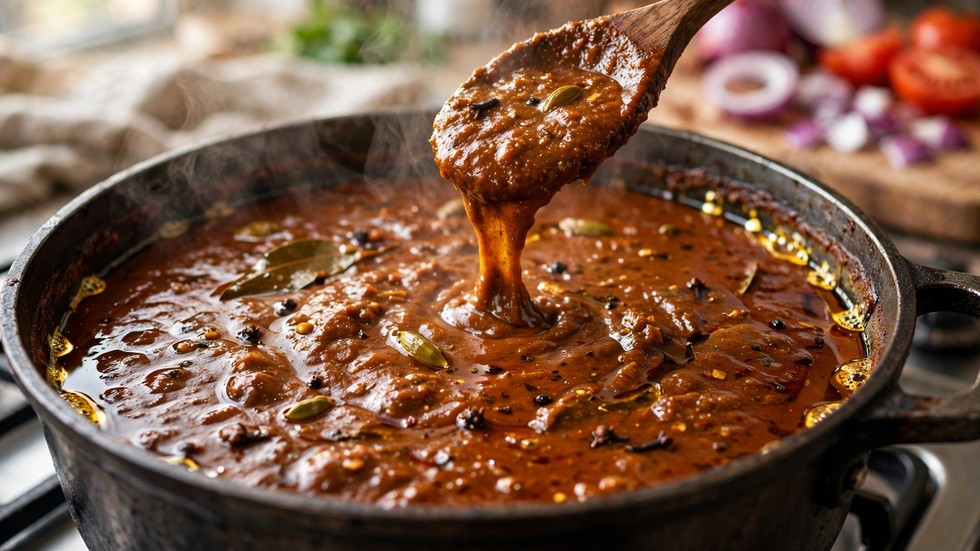
Add the chopped tomatoes, the remaining salt, and the sugar or jaggery if using. Stir everything together, bring to a boil, then reduce to a steady simmer and cook uncovered for 15–20 minutes. Stir every few minutes. You’re looking for the classic sign: the oil separating and shimmering around the edges of the masala, and the tomatoes fully melted into the onions. The mixture will darken, thicken, and start to look glossy. This is the gravy concentrating — water leaves, flavor stays. Taste and adjust salt now; it’s much harder to season evenly after blending.
Step 5: Cool slightly, fish out the bay leaves and cinnamon, then blend smooth.
Let the pot sit off the heat for 10 minutes — blending boiling-hot liquid is a safety hazard. Remove the bay leaves, cinnamon stick, and black cardamom pod (they’ve given everything they have). Add the garam masala now, then blend with an immersion blender until completely smooth and velvety. The blending does something important beyond texture: it emulsifies the oil into the gravy, giving you that thick, clinging, restaurant-style body that coats a spoon. If it’s too thick, blend in hot water a splash at a time.
Step 6: Portion, cool completely, and store.
This is the meal-prep payoff. Ladle roughly 250 ml portions into containers or freezer bags — that’s one generous curry serving for two people, or a solid base for a family curry when doubled. Cool completely before sealing (trapping steam makes the gravy watery and risks spoilage). Refrigerate what you’ll use in the next 4–5 days; freeze the rest. Flat freezer bags stack beautifully and thaw in 10 minutes under warm running water. Label with the date — frozen gravy keeps well for 3 months.
Step 7: Turn it into dinner in 15 minutes, all week.
Here’s the weeknight assembly: heat 250 ml of base in a pan, add your protein or vegetables, simmer 10–12 minutes until cooked through, finish with fresh coriander and a squeeze of lemon. Monday: chickpeas (add a teaspoon of extra cumin). Tuesday: chicken thighs (simmer 12 minutes). Wednesday: paneer cubes (5 minutes, plus cream if you like). Thursday: potatoes and peas. Friday: red lentils cooked separately, stirred in for a dal makhani mood. Same base, five different dinners, because the finishing touches — the protein, a different tempering, fresh herbs — change the character completely.
Pro Kitchen Tips
- Double the onions, not the tomatoes. If you want a richer, thicker, more restaurant-style base, the secret is more browned onion, not more tomato. Onion provides body and sweetness; tomato provides tang. Most home curries are tomato-heavy and taste sharp — flip the ratio and the gravy gets luxurious.
- Don’t skip the cooling before blending. Besides safety, a slightly cooled gravy blends thicker and emulsifies better. Boiling-hot blending tends to produce a thinner, separated result.
- Freeze some portions in an ice-cube tray. Gravy cubes are perfect for when a dish needs just a flavor boost — drop two cubes into a bland dal, a vegetable stir-fry, or even a pasta sauce for instant depth.
- Keep a “fresh finish” kit in the fridge. The base is the foundation, but fresh coriander, lemon wedges, a knob of ginger, and a small tub of cream are what make each night’s curry taste newly cooked. The contrast between the deep, slow-cooked base and bright fresh finishes is the whole magic of this system.
- Make the base slightly under-salted. You’ll add salt again when you build each curry (especially with salty additions like paneer or stock), and it’s easy to add but impossible to remove. Aim for 90% seasoned in the base.
Troubleshooting Advice
- My gravy tastes bitter. The onions likely caught and burnt during browning, or the ground spices burned in Step 3. There’s no real fix for burnt — but first check whether it’s actually bitterness or just under-salted; salt suppresses bitter perception. If it’s genuinely burnt, the kindest thing is to start the onion stage over. Next time, lower the heat slightly and stir more often in the last 10 minutes of browning.
- It’s too thin and watery. It needed more simmering time in Step 4, or the tomatoes were very watery. Fix it now: simmer uncovered until it thickens and the oil separates. For future batches, remember that the gravy always looks thinner hot than it is — it thickens as it cools, so judge accordingly.
- It tastes flat and one-dimensional. Almost always under-browning. Pale onions give pale flavor. Push the onions to that deep amber color next time — it’s uncomfortable the first time because it looks “too dark,” but that’s where the flavor lives. A squeeze of lemon at serving also lifts a flat gravy enormously.
- The oil separated too much and it looks greasy. You may have used more oil than needed, or under-blended. Blend it again thoroughly — proper emulsification pulls the oil back in. When reheating portions, stir well; a little oil rising to the top during storage is normal and not a problem.
- My weeknight curries all taste the same. Vary the finishes, not the base. A different tempering (mustard seeds and curry leaves one night, cumin and dried chilies the next), different fresh herbs, a swirl of cream versus a squeeze of lemon, extra garam masala versus extra chili — these small finishing moves completely change the personality of the dish.
FAQs
How long does curry base gravy last in the fridge and freezer?
In the fridge, in a clean airtight container, it keeps 4–5 days. In the freezer, 3 months easily — I’ve used 3-month-old base that tasted as good as fresh. Always cool it completely before refrigerating or freezing, and never return a used spoon to the storage container; that introduces bacteria and shortens its life dramatically.
Can I make this base without onion and garlic?
You can, though it becomes a different gravy. Replace the onions with an equal weight of chopped bottle gourd (lauki) or cabbage, cook them down soft the same way, and skip the garlic in the paste (use just ginger). The result is lighter and sweeter. Many people cook this way during fasting periods, and it works — just don’t expect the same deep, savory body that browned onions provide.
Do I need to add water when reheating the base?
Usually a small splash, yes. The gravy thickens in the fridge as the starches set, so add 2–3 tablespoons of hot water per portion as it reheats and stir well. You’re aiming for a consistency that coats the back of a spoon thickly. If you’re adding vegetables that release water (like zucchini or mushrooms), skip the extra water entirely.
You might also like: 15-Minute Chicken Karahi for Busy Weeknights
Sunday-me and weeknight-me have an understanding now. Sunday-me does the chopping, the stirring, the waiting while the onions turn to amber gold — all for this batch cook curry base gravy. Weeknight-me just opens the fridge, grabs a container, and has curry on the table before the rice cooker finishes. If you’ve ever wished weeknight cooking felt less like a chore and more like assembling something good, this one pot is the closest thing to a cheat code I’ve found.